How to Use PU Foam Sealant Properly?

PU foam sealant looks simple: attach the applicator, press the trigger, and fill the gap. The reality is less forgiving. A narrow bead around a window frame can expand unevenly, leave hidden voids, or push the frame out of alignment. Correct use depends on substrate condition, product temperature, humidity, nozzle control, and curing time.

Market evidence shows why this skill matters. Grand View Research reports continued growth in the global spray polyurethane foam market, driven by energy-efficiency requirements and tighter building envelopes. The European Chemicals Agency also emphasizes controlled handling, ventilation, and exposure reduction for products containing reactive diisocyanates. These reports support a practical point: PU foam sealant is not merely a filler. It is a technical installation material.

Rick Duncan, Ph.D., a recognized spray polyurethane foam educator, has stated, “Preparation, application, and quality assurance must work together.” That principle applies to small cans as well as professional systems. Read the technical data sheet first. Check the substrate for dust, oil, frost, and loose particles. Shake the can thoroughly. Keep it within the manufacturer’s temperature range. Apply controlled layers, not one oversized blast.

A clean bead may still fail.

This guide explains how to select, apply, trim, protect, and inspect PU foam sealant properly. It also addresses common mistakes, including overfilling, ignoring moisture conditions, and cutting foam before full curing. Some failures are easy to see. Others remain behind the wall, which is why careful preparation and honest inspection matter.
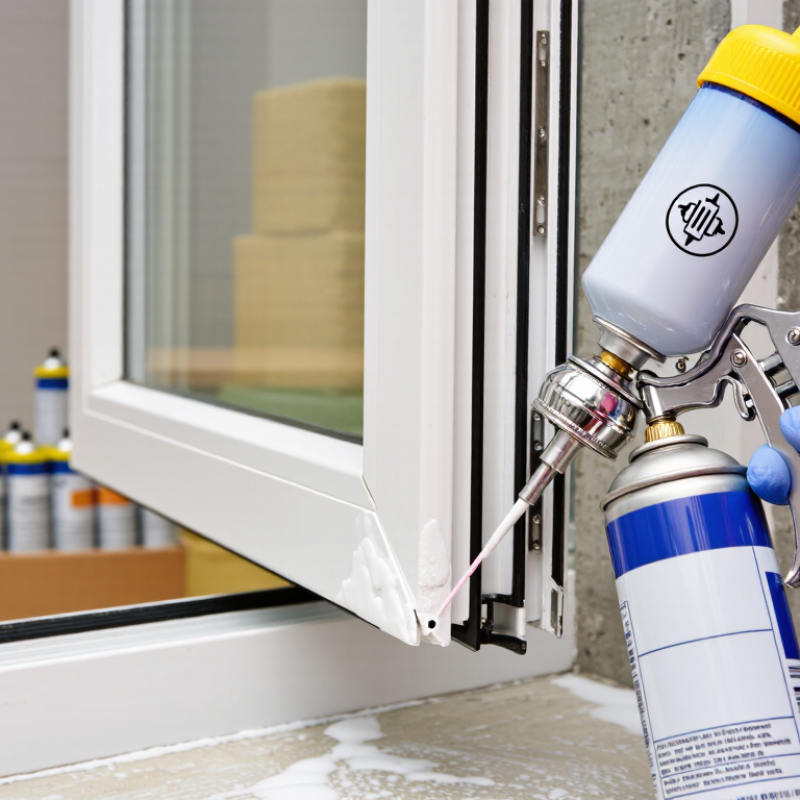
How to Use PU Foam Sealant Properly?

Selecting the Right PU Foam Sealant for the Job

Selecting the right PU foam sealant starts with the gap, not the can. The U.S. Department of Energy estimates air leakage can consume 25% to 40% of a home’s heating and cooling energy. That figure makes product choice more than a finishing detail. Measure the opening, inspect the substrate, and note the working temperature. For narrow cracks, choose low-expansion foam. Large cavities may need a controlled-fill formula or several passes. Too much foam can bow a frame or waste material. I have seen this happen around window jambs.

Check the application label carefully. One-component foam suits many small repairs, while two-component systems cover larger areas and cure faster under suitable conditions. Moisture-cure products need a lightly damp surface, not standing water. Cold cans dispense poorly. Overheated cans may expand aggressively. Always test a small bead first. It reveals adhesion, expansion, and curing behavior. A product described as fire-resistant is not automatically a firestop assembly. Use tested systems where project specifications require them.

Energy performance also matters. UNEP’s 2023 Global Status Report for Buildings and Construction states that buildings use about 30% of global final energy and produce 26% of energy-related emissions. A reliable seal can help, but foam cannot repair a wet wall or moving joint. Wear gloves and eye protection, ventilate the area, and protect nearby surfaces. Trim only after full cure. My weak point is rushing this step; uncured foam looks ready before it is. Recheck the joint after trimming, especially behind uneven masonry.

Preparing the Surface, Tools, and Work Area

Proper PU foam sealant application begins with the surface, not the can. Remove dust, loose paint, grease, and old sealant with a brush or scraper. The joint should feel firm and slightly damp, never wet. Lightly misting a dry surface can improve curing, but excess water may weaken the foam. Check the gap width first. Wide cavities often need several controlled layers rather than one thick fill.

Prepare the work area before opening the nozzle. Cover floors and nearby frames with plastic film, then keep a waste board nearby for testing. Wear chemical-resistant gloves, eye protection, and suitable protective clothing. Ventilation matters. The U.S. Environmental Protection Agency reports that indoor pollutant levels are often two to five times higher than outdoors, and sometimes 100 times higher. Keep doors or windows open when practical, while avoiding strong drafts that disturb fresh foam. OSHA also identifies isocyanates as potential irritants and respiratory sensitizers. This is not a minor detail.

Tips: Store the container within the temperature range stated on its label, and shake it thoroughly. Test a short bead first. Hold the nozzle steadily and fill only part of the cavity, because foam expands. I still sometimes overfill corners when working quickly. That mistake creates extra trimming and can distort light frames. Let the foam cure fully before cutting, sanding, or applying a finishing layer. Clean tools immediately with the recommended cleaner, not by scraping cured residue. Sources: U.S. EPA, Indoor Air Quality; OSHA, Isocyanates Safety and Health Topics.

How to Use PU Foam Sealant Properly?

Preparing the surface, tools, and work area helps improve adhesion, application control, and curing results.

Preparation checklist: The surface should be clean, dry, dust-free, and stable. Essential tools include an applicator gun or nozzle, protective gloves, safety glasses, a utility knife, and a water spray bottle. The work area should be ventilated, protected from overspray, accessible, and checked for suitable temperature conditions.

Applying PU Foam Sealant in Controlled Layers

How to Use PU Foam Sealant Properly?

Applying PU Foam Sealant in Controlled Layers

PU foam sealant works best when applied slowly and deliberately. I always clean the joint first, removing dust, loose mortar, and grease. A slightly damp surface can support curing, but standing water weakens adhesion. Wear gloves and eye protection. The foam sticks quickly.

Shake the can as directed, then test a small bead on scrap material. This reveals the foam’s expansion speed and texture. Apply a narrow layer into the deepest part of the gap. Do not fill the entire cavity at once. Wet foam may expand several times beyond its original volume. Large voids need separate passes, with curing time between layers. Follow the product’s stated depth and reapplication guidance.

Controlled layers reduce waste and internal uncured pockets. I usually leave room for expansion, especially around window frames and lightweight panels. After the first layer becomes firm, I add the next bead gently. Rushing this step can push the foam outward. It happened to me once. The surface looked full, but the center remained soft. After curing, trim excess foam with a sharp knife and protect it from sunlight with a suitable coating or covering. Always test adhesion on unfamiliar surfaces before sealing the visible joint.

Trimming, Curing, and Finishing the Foam

How to Use PU Foam Sealant Properly?

Trimming, Curing, and Finishing the Foam

After application, leave the PU foam undisturbed while it cures. Most foams form a skin quickly, but the inner core may remain soft for hours. Temperature, humidity, and bead thickness affect curing time, so check the product instructions carefully. Lightly misting a dry surface can support curing, but excessive water may weaken the result. I once trimmed a thick bead too early, and the center collapsed. That mistake showed me why patience matters.

When the foam feels firm throughout, trim the excess with a sharp serrated knife. Cut in thin passes instead of forcing the blade deeply. This creates a cleaner edge and reduces tearing. Wear gloves and eye protection, because cured fragments can break away unexpectedly. Pressing or twisting the foam during trimming can loosen its bond. Uneven gaps may need a second, controlled application rather than aggressive cutting.

Tips: Keep the nozzle steady and fill only about half the cavity. The foam will expand. Protect nearby surfaces with masking film, and test the trimming method on a small area. After trimming, cover exposed foam with suitable paint, sealant, or another compatible finish. Unprotected foam can degrade under sunlight and moisture. Do not rush this part. A neat finish often depends on curing conditions, not just application skill.

Handling Safety, Storage, and Common Application Problems

How to Use PU Foam Sealant Properly?

Wear chemical-resistant gloves, safety glasses, and long sleeves before opening a PU foam sealant can. Isocyanates may irritate skin and lungs, and repeated exposure can cause respiratory sensitisation. The European Chemicals Agency requires professional users of certain diisocyanate products to complete safety training. Ventilate the room, especially around windows, bathrooms, and small service spaces. Keep flames, sparks, and smoking materials away. The U.S. Occupational Safety and Health Administration identifies isocyanates as causes of occupational asthma and other breathing problems. A dust mask is not always enough; follow the product safety data sheet and choose suitable respiratory protection when ventilation is poor.

Store cans upright in a cool, dry place, away from sunlight and freezing temperatures. Do not leave a can inside a hot vehicle. Shake it thoroughly, attach the applicator, and test a small bead first. The foam expands after application, so fill only part of the gap.

I have seen beginners overfill cavities, then cut away hardened foam for hours. Moisture can improve curing, but standing water creates weak, uneven foam. If the nozzle clogs, forcing the trigger can cause sudden discharge.

Clean the applicator immediately when the instructions require it. A half-used can may become unusable overnight. That is frustrating, but it often reflects poor cleaning or storage rather than defective material. The safety data sheet remains the most reliable reference for curing time, disposal, and exposure controls.

Contact Us

We offer a just-in-time delivery solution supplying the highest quality materials to our customers. Get in touch today and learn how we can help your company.

Get in touch